Labels

Showing posts with label Home Improvement. Show all posts

Tuesday, January 17, 2012

Kitchen Appliance Closet

Kevan and I have a 2 page list of projects that we need to work on.  Projects like "redo the well house", "finish framing the bedroom windows", "fix chainsaw", and many other projects.  Well, we both had the day off yesterday for Martin Luther King Day and when Kevan woke up he asked me what we should work on.  Of course, we should work on the MANY projects we need to finish, but what fun is there in that?  ;o)  So, I told him we should redo our ugly "middle room".  Which isn't on our list at all.  lol!

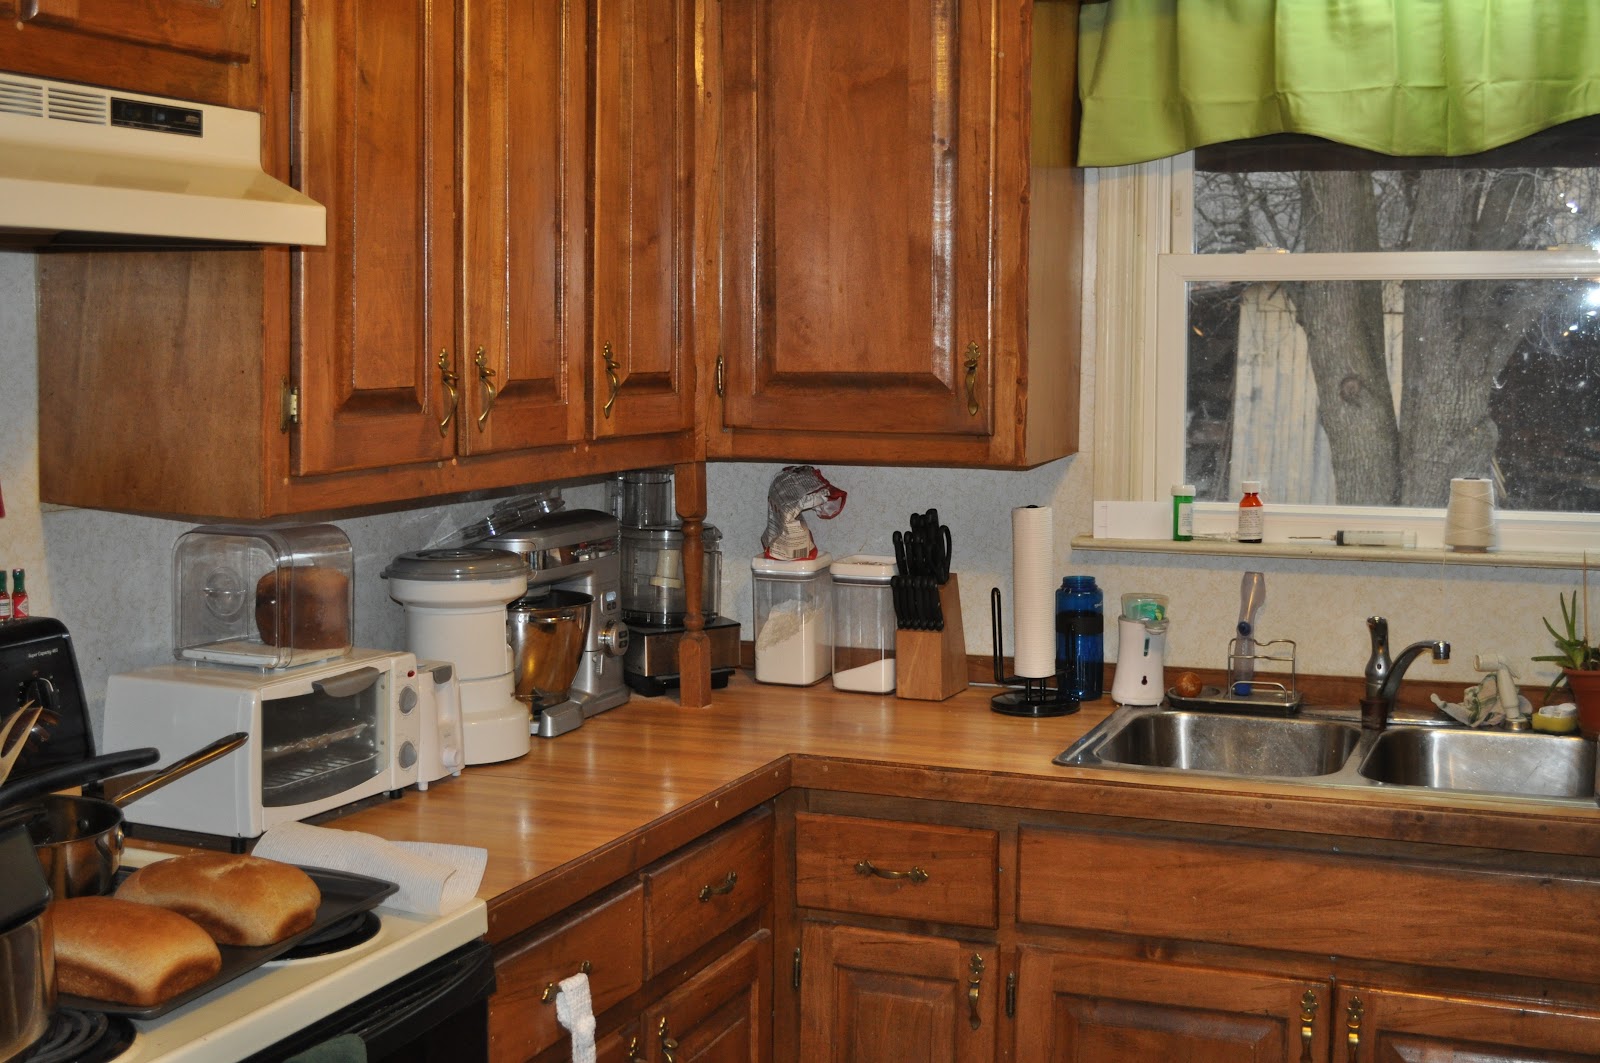
The reason I wanted to do this was because I NEED COUNTER SPACE and my appliances take up way too much of it.  I wanted an appliance closet.  Here is what my counter looked like beforehand.

Our ugly middle room is a room that contains our water heater and a green/yellow shelf unit.  We believe this room was the back porch before they built on to the original home.  It has an "outside door" in the kitchen leading to it and then another "screen door" leading to the wood stove room (which also used to be a porch before they walled it in).  Here is a before picture.


Due to the ugliness of the water heater side of the room I have refrained from showing you for fear you will have nightmares.  We've only used this room to hold our recyclables and bird seed.  Side note - we do not have garbage pick up where we live (I'm not sure if we can...I've never asked) and we are supposed to take our garbage to a city dump, but Kevan and I HATE the idea of putting things into the landfill.  So, we recycle what we can, throw the food trash into the woods for the animals (one day we will compost it or give it to our pig/chickens) and then burn the rest in our outdoor burn bin.  Sometimes, we do have items that we can't burn or recycle and those do end up in the landfill, but that doesn't happen very often.


As you can see in the picture above, the room has paneled walls.  We have this paneling in a few places in the house (soon to be painted) and one room upstairs that is filled entirely by this paneling (one day maybe I will post pictures). I'm not really sure what the previous owners were thinking.  Maybe they thought it was paint by number.  

Anyway, the first thing we did was remove the shelf unit and I started to paint the paneling.  I had Lowe's tint a small can of Zinsser so it would cover better than regular paint and to ensure it would stick to the paneling.  It worked great and the color ended up matching the surround of the screen door perfectly.  Then, Kevan built the shelving out of a single 4x8 sheet of  plywood.  This was a LOT cheaper than buying individual shelving with the pretty laminate.  I wasn't really worried about prettiness.  I can paint or stain them one day.  Here is a picture after the paint and after Kevan installed the shelves.  Maybe we can do something to the floor one day...but that isn't a priority right now.


Here is a picture of Kevan sanding the sides a little bit for me.  He didn't want me to get a wood splinter.  He's so sweet.  (Also, the lines you see on the wall are the groove lines in the paneling...no paint can fill those in).


I could barely wait for him to finish and pretty much kicked him out while he was still sanding because I was SO EXCITED to move all of my appliances in.  Don't they look great?  I also love that I have recycle bins now for metal, plastic and glass!


A picture of my counter now.


Much better.  My favorite part of this project wasn't actually the counter space.  It was something my husband said before we even started the project.  We were in the car on our way to Lowes and I asked him why he was so excited to do this project (because why would he care about my appliances.  lol).  He said, "Because I know it will make you happy."  Is that not the sweetest thing you've ever heard?  

But, just so you don't think he is "too" sweet...while we were at Lowes he asked me to hold this big piece of wood with my legs so it wouldn't flip when he stood on it (he was seeing if it could hold his weight since we will be building a bridge).....anyway, when he stood on it, it flipped and SMACKED me in the leg.  HARD!  I have a 4x4 inch bruise on my leg now.  He just laughed.  I was almost breaking out crying at Lowes.  So, he isn't all sweetness.  lol!

Below is a Before and After Pic.

Friday, September 02, 2011

The Romance of a 100-year Old Home

As I post things about our house in TN on Facebook or on here I receive so many comments about it being romantic or a beautiful getaway.  I thought that I should set everyone straight.  I just want to be honest.  I should actually post this closer to Halloween, but since I have today off from work I thought it would be a good day to reveal the "romance" of our home.

Warning:  This is not romantic, but scary.  You may not want to go any further.

This will be revealing WAY MORE than I would like to reveal, but I am hoping one day that the following pictures will be replaced with pictures of a beautiful "getaway" from our hard labor.  Very hard labor.  You will see what I mean.

Some of you know that I do not go upstairs unless I have to.  The big upstairs bedroom is our cat's favorite room.  They love it.  So, I do have to go up sometimes to search for them, but if Kevan is not home and/or it is night time....I don't venture upstairs.

You are probably thinking, "it really can't be that bad".  No!  It really is.  At least, to a woman, it is THAT BAD. 

Are you ready?

This is a picture of the lower steps leading upstairs.  They look great (except for the dust...oops!).  


Then, as you get the the 2nd set of steps you see that things upstairs are not like downstairs.

Notice the white drywall, brown paneling and house/church paneling.  Not sure what they were thinking.  Also, the top steps are carpeted.  When they redid the bottom steps....why did they leave out the top steps?  These are questions we ask all the time when walking around this house.  What were they thinking?

In the previous picture you probably noticed the light on the wall.  Here is a close-up.


Also, there is a chandelier hanging at the top that I can see was probably once really pretty.  I think my mom might like it even now.  :o)  She loves antiques.  [note, I showed this post to her before I posted it and she loved it.  She thinks I need to move it to a part of the house where everyone can see it.  lol]  Reminder, I don't go upstairs...so any dust you see will most likely remain until the items are taking down, thrown away, moved or painted.

Then, you might have noticed that one wall is paneling and drywall.  Why didn't they redo the whole wall?  Why half of a wall?  What were they thinking?


Are you ready to see inside the large bedroom?


 Double doors...could be a really nice entrance one day....I'm thinking pretty french doors!

The first thing you will notice when crossing the threshold is the pretty carpet.


Again, what were they thinking?  I know, I know....a time long long ago this was in style.  Also, they say cats cannot see color.  So, maybe that is why they love it upstairs.

The next thing you will notice is the TV in the corner.  The previous owners left it for us.  I didn't plug it in to see if it works.


Oh, I forgot to mention that this room has no heat or air conditioning.  So, they installed an air unit in the wall...which I will not show in this post because, again, I didn't dust beforehand.  This will be an issue one day if we redo this room since I will, most likely, want heat!

Did you notice the brand of TV?  


General Electric.  Kevan works for GE so I had to mention it.  :o)

One of Kevan's favorite things about this house/room is the upstairs "balcony".  I use this term VERY loosely.  When you open the doors to the "balcony" it is actually the tin roof of the house.  So, when you step out you are not on a level "balcony", but on a roof that is pitched in all different kinds of ways.


Now, besides the beautiful television they also left a pool table for our recreation.  I'm sure they thought they were doing us a huge favor since we now already have 2 items in our "game room".  I think Kevan and his dad see hours of fun playing pool.  I see something that is going to be really heavy and hard to give away.  Maybe my FIL will want it in his basement?  ;o)


I actually think the wall structure is very cute and has character.  But, I also imagine all of the work that goes along with the redo.

At some point one of the owners of this home decided to install an intercom system so they didn't have to yell downstairs.  If you ever visit our house the first conclusion you will come to is that the owners must have been too poor to buy a ruler or a level.  


Growing up my grandparents had an intercom system and I thought it was so cool.  Now, not so much.

Before you think that all of the walls up here are drywall I will disappoint you by showing you that for some reason one of the walls is paneling.  Very pretty house/church paneling.  At least, one day a long long time ago I guess this was in style.


Here is a close up.


Now, one last picture of this room that I will leave you with.  This is a picture of how straight the walls are where they meet.  Again, I think the owners didn't own a ruler or a level.  Poor past owners.  Must have been hard to do so many projects without the necessary tools.  If you can't see what is wrong in the picture below...you probably should not be a carpenter.


Now, my favorite part of this post.  Let's imagine what could be done.  This is what I'm thinking.  Tear out and install nice up-to-date carpeting.  Add a few bookshelves for all of our books and you get...


Or add some bead board to the ceiling...(this is what it would look like if we had the money to pay someone to fix it up for us).  I love it and especially the skylights!


Maybe one day it will be a game room with a big TV like this one...


And one more for inspiration....


So, not everything about living on a farm in Tennessee is romantic.  A lot of it is about hard work and improvements.  If we ever finish the Master Bedroom downstairs I will look forward to improving the upstairs.  Inside and Out.  I won't even go into what the pastures look like or the barn. 

Although, we are only hoping to live here for a few years so I am conflicted on whether we should leave it to the next owners or fix it up beforehand.  What are your thoughts?  What would you do if you owned this home?

Also, don't judge me for the way my house looks upstairs.  When I go up there, I see potential.  :o)  Hopefully, one day....(soon)...it will be pretty and I will be proud to show you my home.

They way I look at it is.  God is Sovereign over all things.  This is the house he has provided us during our "trial run" at living in the country.  The house he wanted us to be in.  He could've provided a mansion that needed no improvements, but he provided a home that will require hard work instead.  I will be thankful for the things he has provided us in this home and for all the things we will learn along the way.  Maybe that will be my next post...."The blessings of a not so perfect 100-year-old farmhouse".

"Be thankful in all circumstances..."  I Thessalonians 5:18

Monday, August 15, 2011

Floor Update

A few people have asked about how the floor is going.  I still haven't put the finished poly coat on yet, but I have stained them.  Here are a few pics for now to show you the progress.

Remember what it looked like in the beginning after we removing the 2 layers of carpet/foam:


Picture of the floor after the sanding, prior to staining:


Picture after the staining:


Another post stain picture.  You will notice a board that is missing toward the right.  Kevan and his dad repaired this and it has now been stained.


So, the floor is ready for the "Finish"....I just have to find the time.  Hopefully, I will be doing this last step on Friday.

Sunday, April 10, 2011

An Update On Our Demolition Project

This weekend, Kevan and I decided to rent a belt sander so we could work on the wood floors in the master bedroom.  The belt sander cost about $42 a day (plus the cost of sandpaper), but since they are not open on Sundays we got a day for free. 

Once we made it home with the sander I realized we were a little early on the rental.  We still had a lot of the carpet still on the floor.


If you remember my earlier post when we pulled up the 2 sets of carpeting and pad there was padding leftover that was glued down.  We pulled up the rest of the carpet/padding and started working on the pad/glue.  We had to sit and scrape all of the black pad and glue from the floor before we could sand.  It is hard work.  Saturday night my arms felt like they were going to fall off.  One word...Ibuprofen!  :o)

While I scraped Kevan started using the sander.  You would think it was easy to use a sander, but it isn't.  It is hard on your arms.  Also, you don't push it...you pull it.  The harder it is to pull the better the sanding job.  Also, you CANNOT let it sit on a certain area or it will sand too much and create burn lines on the floor.  I know because I did it.  I learned quickly.

Here is what the floor looked like when we started the sanding.


After a few passes.  This will give you an idea of what it looks like.


A few more...


In the above picture you can tell that the middle is the most past area, followed by the bottom.  Then, the top is where we haven't passed at all.

After a few HUNDRED passes...here is what it looks like.


We only worked on it about 4 hours today since we had church this morning.  But, this is what the room looked like when we stopped tonight.


The sander is due back in the morning by 8am.  We were really discouraged when we stopped today.  We have been second guessing ourselves wondering if we are doing the right thing.  2 people that stopped by told us that we should just carpet over it.  I just feel bad carpeting over almost 100-year-old oak hardwood floors.  After writing this post though and reminding myself of where we started I feel a bit better.  I also looked online at the prices for flooring for a 14x15 foot room and it would be $900 (installed) for carpet and $1,000 for oak hardwood (installing ourselves).  After seeing the prices I feel a lot better too since we have only put out less than $100 so far.  We will need to do it at least one more weekend and then buy the polyurethane, but it will still only be about $300 for hardwood floors, plus the experience of having done it ourselves and the special-ness of having original flooring.

To give you an idea of how I feel after 2 days of scraping, sanding, vacuuming, sweeping and throwing the cats out of the room over and over again....I'm ready to go back to my day job tomorrow.  It requires no manual work whatsoever.  My back, arms, wrists don't ache from working at a computer all day.  I can sit in my PJ's until noon if I want to and just use my fingers to type.  I can't wait to sit on my bum and work at my laptop tomorrow.  :o)

Saturday, April 02, 2011

Demolition of the Master Bedroom

Kevan, Kevan's dad and I started the demo work of tearing down the wall paneling and taking up the flooring in our master bedroom here in Tennessee. When you start looking behind the walls and under the carpet of a 1930's home you are bound to find something you were not expecting.  Unfortunately, I did not take a before picture of the bedroom, but here is a picture that shows the old paneling as well as the wall underneath.  Click the picture to make it bigger.


I'm sorry for the blurry picture, but I wasn't using my good camera.  As you can see from the picture we were very surprised when we removed the paneling and found a shiplap wall (sort of like tongue and groove). 


You can sort of see that the wall was wallpapered with old newspapers.  I was able to find a date on the newspaper that was 1913.  So, I am unsure if the house is older than 1930 or if they wallpapered with older newspapers.  We haven't decided what we are going to do yet.  We had planned to tear down the paneling and then drywall, but we didn't know that the wall would not reveal normal framing.  Also, we need insulation so we may have to do spray insulation between the boards.

The next surprise was that there were 2 layers of carpet and padding on the floor.  Under the carpet and padding we found tongue and groove quarter sawn oak flooring.  You can see the condition of the floor below.  The backing of the 1st layer of carpet has stuck to the flooring.  The floor seems to be in pretty good shape though.  If we can successfully remove the black backing and sand the floors they may turn out to be quite nice. 


We aren't sure if this is good news or bad news yet.  We'll keep you updated.  My body is so sore...who knew demo work would be so tiring.  I thought it was supposed to be the fun part.

Saturday, February 19, 2011

Let there be light....

Kevan started working from home about 6 months ago.  He moved into our office and started to realize that even though there is an overhead light it was way too dark to work when the day is overcast or when he is working late.  He decided to install recessed lighting (or can lights).  So, one day he went to home depot and bought the supplies (4 can lights + supplies).  I was pretty surprised how easy it was (although, I wasn't the one doing all the work).

First, he measured the office and then he measured in the attic and then he measured somemore.  I came in and stared at it with him and made suggestions and then he measured somemore.  Then, we decided this was the best place for the first one so he taped up the template. 

DSC_0024

He purchased this really cool hole saw kit that traps most of the dust and ceiling peices when you cut the hole for the ceiling.  We had the Klein version, but Amazon has one that is similar to give you an idea.

DSC_0060

Here is what the ceiling looked like after he cut it with his hole saw.

DSC_0068

He just used a razor knife to remove the remaining drywall.  As you can see from my floor....it doesn't catch everything.  Insulation fell through from the attic.

DSC_0056

But, look how much dust/popcorn ceiling pieces were not on my floor.

DSC_0067

Then, he went up in the attic and fed down a cable to me in the office.

DSC_0026

He finished wiring the light, I handed him the clips and now the can is safely in the ceiling.

DSC_0054

He then added the trim ring and the light bulb and we ended up with this.

DSC_0022

We didn't like the bulb sticking out so we went back to the Home Improvement store and purchased a different trim ring that allowed the receptacle to mount differently in the can.  This way the light bulb goes all the way up into the can and I think it looks much better.

DSC_0202

Now, his office has a lot more light and he will be able to see better when working.  Here you can see two in the picture, there are 4 total. (Also, pretend you don't see his messy desk and we know the fan is off-center...we have no idea what the previous owners were thinking)


Lastly, Kevan didn't want to use the same switch as the fan so that he could use one and not the other.  So, he also wired a new switch.  In his defense, it is perfectly straight, but his wife (the picture taker) was apparently leaning when she took the picture.  Also, it is a dimmer switch so he can dim the lights if they are too bright.


Now, I'm about to confess something that I'm very embarrassed of.  Are you ready?  This is what my hallway looks like when my husband is working on a home improvement project.


Now, I could be a naggy wife and nag him until it is put away, but I wait patiently for several a few weeks for him to finish the project and at some point he decides it is time and cleans it up.  Or, I warn him that someone is coming over.  At least he lines it all up on one side I guess so we can walk down the left side.  :o)  The clothes lying on the floor is his "outfit" he wears when he's up in the attic.  So, I guess it does fit in with the other tools/stuff on the floor.  Anyone know how to keep your husband organized while doing a home improvement project?  I need ideas that will help me keep my house clean, but not nag him to death.  I want to be able to sweep/vacuum my hall without having to go around everything.